Create Video Ai Hug
The integration of AI in video creation has revolutionized how we express emotions and connect with others. One unique application is the creation of personalized "hug" videos using artificial intelligence. This innovative approach utilizes machine learning algorithms to generate realistic, emotional, and heartfelt interactions, allowing users to create and share meaningful experiences with loved ones. By leveraging AI, individuals can design video content that conveys empathy, warmth, and care, even from a distance.
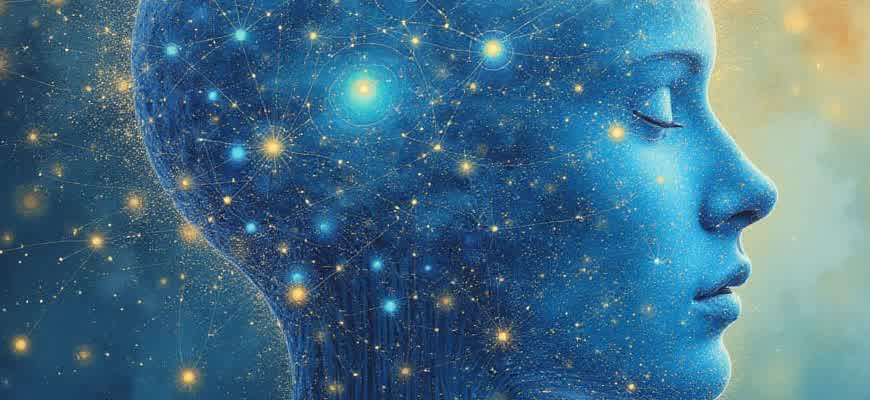
Important: AI-generated hugs are not limited by physical proximity, offering a new form of emotional connection in a digital world.
Here are the main steps involved in creating such videos:
- Data Collection: Gathering relevant emotional and behavioral data to train the AI model.
- Model Training: Using this data to teach the AI how to replicate human-like gestures and expressions.
- Video Synthesis: The AI generates video clips that simulate human hugs, complete with appropriate motions and emotional context.
To better understand how this works, here is a basic overview of the process:
| Step | Description |
|---|---|
| Data Collection | AI models require a vast amount of visual and emotional data to understand human interactions. |
| Training | Machine learning algorithms analyze data to learn how to simulate human emotions and body movements. |
| Generation | The AI produces video content that simulates a hug with realistic gestures and emotional cues. |
Create Video AI Hug: Practical Guide for Effective Usage
Artificial intelligence has revolutionized the way we create and interact with digital content. One of the most exciting applications of AI is the generation of videos, especially those that focus on generating human-like interactions, such as virtual hugs. This guide will walk you through the process of creating engaging video content with AI that mimics real-world emotions and movements, enhancing user experience and engagement.
Utilizing AI for video production not only saves time but also opens doors to endless creative possibilities. AI-driven technologies are now capable of generating lifelike movements, expressions, and gestures. By focusing on emotional and interpersonal connections, AI tools can create videos that resonate on a deeper level with audiences.
Steps to Create an AI-Powered Hug Video
- Choose the Right AI Tool: Start by selecting a software that specializes in video animation or motion capture. Some AI tools offer pre-set animations that can be customized, while others allow for the creation of original movements based on input data.
- Input Data for Motion Capture: Use either real-life motion capture data or synthetic input to guide the AI in creating realistic movements. The more data you provide, the more accurate the AI's output will be.
- Refine Gestures: Customize the intensity and duration of the hug by tweaking the parameters within the AI platform. The AI should be able to adjust the emotional tone of the hug based on the context you're creating.
- Add Sound and Visual Effects: Enhance the video with sound effects and visual cues to make the hug feel more immersive and emotionally impactful.
- Preview and Edit: Once the video is generated, preview it to check the fluidity of movements and emotional depth. Use editing software to adjust timing and add finishing touches.
Key Tips for Effective Usage
- Understand Emotional Nuances: Ensure that the AI model you're using understands emotional subtleties to make the hug feel genuine. Look for tools that offer facial expression or voice modulation features.
- Test Different Scenarios: Experiment with various types of hugs (e.g., comforting, joyful, affectionate) to see how well the AI can differentiate between emotional contexts.
- Optimize for Audience: Tailor your AI-generated hug videos to the audience’s preferences, ensuring that the tone and delivery match the intended emotional outcome.
Practical Considerations
| Aspect | Considerations |
|---|---|
| Data Quality | Higher quality input data leads to more realistic AI-generated movements. |
| AI Processing Time | Complex scenes may require additional processing time for accurate results. |
| Customization Options | Some tools allow for detailed customization, enhancing the uniqueness of the hug. |
"AI-powered content creation opens up new possibilities for emotional connection, allowing creators to craft experiences that resonate deeply with viewers."
Getting Started with AI for Video Production Using Hug
AI-powered tools are revolutionizing the way video content is created, and Hug offers a seamless way to tap into this innovative technology. By leveraging AI models, you can automate several stages of video production, from script writing to editing. This guide will walk you through the key steps to begin using Hug's AI for video creation.
To start using Hug for video production, it's important to first understand the available tools and models. Hug provides access to various pre-trained models that can help with different aspects of video creation, including video editing, script generation, and even generating visuals. Below are some initial steps to follow to dive into the world of AI video creation with Hug.
Steps to Begin
- Sign up and explore Hug's platform - Create an account to get access to Hug's powerful tools for video production.
- Choose the right model for your needs - Depending on your project, you can select different models for script writing, video generation, or editing tasks.
- Upload assets or input parameters - Provide the necessary input, such as video clips, audio, or text prompts, to guide the AI in generating your video.
- Review and refine - AI tools can suggest edits or help generate new content, but manual refinement can ensure the video matches your vision.
Key Features of Hug AI for Video Creation
- Script Generation: Use AI to draft scripts or dialogues for your video, saving time on the writing process.
- Video Editing: Hug's AI models can help with automatic editing, trimming, and enhancing videos based on user input.
- Visual Generation: Hug also offers tools to generate unique visuals or animations that can be integrated into your video.
Hug's AI tools significantly reduce the time spent on repetitive tasks and allow for more creativity and efficiency in video production.
Example Workflow
| Stage | Action |
|---|---|
| Initial Setup | Create an account and select the appropriate AI models for your video project. |
| Asset Input | Upload video footage, audio, or any text data required for the AI to work with. |
| Content Generation | Allow the AI to process and generate the video content based on the parameters provided. |
| Review | Refine the AI-generated content manually to achieve the desired result. |
Step-by-Step Guide to Uploading Your Content for Creating AI Hug Videos
Uploading your content to create a personalized AI Hug video involves a series of straightforward steps. This process ensures that your material is processed and transformed into a high-quality AI-generated video that meets your expectations. Below is a detailed breakdown of the procedure, from the initial upload to the final video output.
Before starting, make sure your content meets the platform's requirements in terms of file format and size. Ensure that you have the necessary permissions for the content you are uploading and that it aligns with the platform’s content guidelines.
Step-by-Step Process
- Login and Access the Upload Section: Start by logging into your account on the platform. Navigate to the video creation section where you will find an option to upload your files.
- Select Your Content: Choose the media files (images, videos, or audio) you want to use in the AI Hug video. Make sure the files are in a supported format such as .mp4, .jpeg, or .png.
- Upload Files: Click the upload button and select the files from your device. Wait for the files to upload completely before proceeding.
- Adjust Settings: Once uploaded, you may need to customize settings such as video length, background music, and video style. These options allow you to personalize the final output.
- Preview and Confirm: Before finalizing the video, preview it to ensure everything is aligned correctly. If necessary, make adjustments to the content or settings.
- Finalize and Export: Once satisfied with the preview, click the final button to generate and download your AI Hug video.
Important: Ensure that the content you upload is optimized for video creation. Low-resolution images or videos may result in a lower-quality final product.
Upload Specifications
| File Type | Supported Formats |
|---|---|
| Images | .jpeg, .png, .gif |
| Videos | .mp4, .mov, .avi |
| Audio | .mp3, .wav, .aac |
By following these steps, you can effortlessly create an AI Hug video that captures the essence of your content in a unique and engaging way.
Selecting the Right Input Media for Optimal Video Results
When working on AI-generated videos, the choice of input media is a critical factor that directly impacts the quality of the final output. The process of selecting the right materials–whether it's video footage, images, or audio–can significantly enhance or hinder the final video results. To ensure optimal performance, it's essential to consider how the AI interacts with different types of data and how they affect the generated video’s coherence, visual appeal, and storytelling. The key to success lies in selecting the most suitable media that aligns with the intended video concept and desired outcomes.
In this context, understanding the specific requirements of the video generation process can help in making informed decisions. For example, high-resolution images and well-recorded audio can vastly improve the quality of the final output. On the other hand, low-quality or poorly synchronized media may result in a disjointed and ineffective video. Below, we discuss the primary factors to consider when choosing input media to achieve the best video results.
Key Considerations for Choosing Input Media
- Resolution and Quality: High-resolution images and videos will produce sharper and clearer results, contributing to a more professional and polished final product.
- Synchronization: For videos involving both audio and visuals, ensuring that the media is properly synchronized is essential to avoid mismatched frames and sound.
- Relevance to Content: The media you choose should align with the theme and message of the video. Disconnected visuals or irrelevant soundtracks can distract from the core message.
- Format Compatibility: Ensure that your input media is in a format supported by the AI video generation tool for smooth processing.
Types of Input Media and Their Impact
| Input Type | Impact on Final Video |
|---|---|
| High-Quality Video | Enhances overall visual clarity, smooth transitions, and more natural scene changes. |
| High-Resolution Images | Improves details and sharpness in generated videos, allowing for more vibrant and accurate scenes. |
| Professional Audio | Clear, high-quality sound makes the video more engaging and immersive, enhancing storytelling elements. |
Choosing the right input media isn't just about raw quality; it's about ensuring that the materials support the overall video’s message, tone, and intended effect.
Customizing AI-Generated Videos for Your Brand Identity
AI-generated videos provide an innovative way to bring your brand's vision to life, but to truly resonate with your audience, it's essential to customize the output according to your brand's specific needs. Customizing these videos goes beyond just adding a logo or adjusting colors; it involves adapting the content to align with your brand’s tone, message, and overall visual identity.
Customization allows you to craft a unique experience that feels natural and authentic to your brand. This can involve adjusting the script, voiceover tone, visual elements, and even the pacing of the video to reflect your brand's personality. By integrating these elements strategically, the video can become a powerful tool to reinforce your brand's recognition and values.
Steps to Tailor AI-Generated Videos for Your Brand
- Brand Voice Integration - Ensure that the script matches the language and tone your brand uses in other marketing materials.
- Visual Adjustments - Modify colors, fonts, and logos to match your brand’s established style guide.
- Target Audience Refinement - Tailor the pacing, style, and visuals to appeal directly to the demographics your brand targets.
Elements to Focus on During Customization
| Element | Customization Tips |
|---|---|
| Voiceover | Choose a voice that embodies your brand’s tone–professional, friendly, or casual. |
| Script | Ensure the script reflects your brand’s messaging and speaks directly to your target audience. |
| Visuals | Adjust the design and style of visual elements, such as logos, color palettes, and imagery, to align with your existing brand guidelines. |
"Tailoring AI-generated content to match your brand's personality ensures a cohesive and engaging experience for your audience."
Key Considerations for Consistency
- Consistency Across Channels: Maintain a consistent look and feel across all marketing platforms by aligning the AI video with other content formats.
- Brand Recognition: Ensure your logo and brand elements are visible without overpowering the core message of the video.
- Adaptability: Ensure the video can be easily repurposed for different formats, such as social media snippets or presentations, while keeping the brand identity intact.
How to Improve and Perfect AI-Generated Videos for a Professional Look
AI-generated videos are becoming more accessible and capable of producing impressive results, but achieving a polished, professional final product requires some additional work. Refining these videos involves several key steps that can transform raw AI footage into something truly refined and visually appealing.
Whether you are working with AI to create promotional content, educational materials, or social media clips, the editing process plays a crucial role in ensuring your video reaches its full potential. Below are the essential steps to edit and refine AI-generated footage for a more professional touch.
Key Editing Steps for Professional AI Videos
- Enhance Visual Quality: Start by correcting any visual flaws, such as resolution issues or poor color grading. Use tools like Adobe Premiere Pro or DaVinci Resolve to adjust brightness, contrast, and saturation.
- Audio Refinement: AI-generated content may sometimes have distorted or flat audio. Use audio-editing software such as Audacity to eliminate noise, balance sound levels, and enhance clarity.
- Fine-tune the Timing: Ensure the pacing of your video aligns with the intended message. Adjust clip durations, transitions, and animations to avoid rushed or sluggish sequences.
- Incorporate Custom Graphics: Add custom logos, captions, or other branding elements to personalize your video and give it a professional edge.
Advanced Techniques for High-Quality Refinement
- Stabilization: If your AI-generated footage has shaky camera movements, use stabilizing software to smooth out the shots.
- Use of Color Grading: Apply professional color grading to give the video a cinematic look and enhance its mood.
- Editing Transitions and Effects: Smooth out transitions between clips, add slow-motion effects, or use advanced visual effects to make your video stand out.
Helpful Tools for Video Editing
| Tool | Function |
|---|---|
| Adobe Premiere Pro | Professional video editing software for detailed adjustments, color grading, and audio refinement. |
| DaVinci Resolve | Known for powerful color grading and post-production editing tools. |
| Audacity | Free, open-source audio editing software for noise reduction and sound optimization. |
"Refining your AI-generated video is as important as the initial creation process. A few adjustments can significantly elevate its overall quality and effectiveness."
Exploring Video Formats and Outputs for Different Platforms
In today's digital world, creating videos that cater to specific platforms is crucial for maximizing engagement and reach. Different social media and video-sharing platforms require various video formats and output specifications, including resolution, aspect ratio, frame rate, and compression settings. Understanding these requirements is essential for ensuring that videos are optimized for each platform's algorithms and user experience.
This guide will explore the most commonly used video formats and their appropriate outputs for platforms like YouTube, Instagram, Facebook, and TikTok. Each platform has unique requirements, and knowing how to tailor your videos accordingly can significantly improve their visibility and effectiveness.
Video Formats for Major Platforms
- YouTube: YouTube supports a variety of video formats, but the most recommended ones are MP4 (H.264 codec) with AAC audio. The ideal resolution is 1080p, with an aspect ratio of 16:9.
- Instagram: Instagram favors videos in MP4 format, with a maximum resolution of 1080p. The most common aspect ratios are 1:1 for square videos, 4:5 for portrait, and 16:9 for landscape.
- Facebook: Videos uploaded to Facebook should be in MP4 format. A resolution of 720p to 1080p is recommended, with a 16:9 aspect ratio for landscape and 1:1 for square videos.
- TikTok: TikTok videos should be uploaded in MP4 or MOV format, with a resolution of 1080p. The platform supports vertical videos with an aspect ratio of 9:16 for optimal display on mobile devices.
Common Video Output Settings
When exporting videos for social media, it's crucial to choose the right output settings. Below is a table highlighting key settings for different platforms:
| Platform | Recommended Format | Resolution | Aspect Ratio | Frame Rate |
|---|---|---|---|---|
| YouTube | MP4 (H.264) | 1080p | 16:9 | 30-60 fps |
| MP4 | 1080p | 1:1, 4:5, 16:9 | 30 fps | |
| MP4 | 720p-1080p | 1:1, 16:9 | 30 fps | |
| TikTok | MP4 or MOV | 1080p | 9:16 | 30 fps |
When choosing the video format, always prioritize compatibility with the platform's settings to avoid issues with video playback or quality loss. Tailoring your content to each platform's specifications ensures a smoother viewing experience and greater engagement.
Streamlining Consistency with AI-Powered Video Creation
Incorporating an AI video generation tool into your production pipeline can significantly enhance efficiency while ensuring consistency across your projects. By automating repetitive tasks, such as scene transitions, text overlays, and visual effects, you can focus on higher-level creative decisions. Moreover, AI-based video tools help maintain uniformity in style, pacing, and tone, making it easier to deliver cohesive content across multiple videos or episodes.
To integrate such tools effectively, it is crucial to understand how they can complement your existing processes. With proper planning, AI video generators can become an integral part of your workflow, offering time-saving benefits and ensuring your video projects meet the highest standards of consistency.
Key Steps for Integration
- Analyze Current Workflow: Assess your current video creation steps to identify tasks that can be automated using AI.
- Define Content Style: Set clear guidelines for the desired video style and tone to ensure the AI maintains uniformity across all projects.
- Choose the Right Tool: Select an AI video creation tool that aligns with your production needs and is compatible with your software stack.
- Train and Customize: Take the time to train the AI tool with your brand's specific preferences, ensuring it adapts to your unique style.
Best Practices for Consistency
- Template Usage: Create reusable templates for video structures, titles, and intros to streamline production and ensure consistency.
- Regular Review: Periodically review AI-generated videos to ensure they adhere to your standards and make adjustments as necessary.
- Automation of Repetitive Tasks: Leverage AI for tasks like color grading, audio leveling, and motion graphics to keep quality consistent throughout.
"By utilizing AI for video creation, teams can not only increase productivity but also ensure each video maintains the same professional quality and style."
Examples of Workflow Integration
| Stage | Manual Task | AI Automation |
|---|---|---|
| Editing | Manual scene transitions | Automated smooth transitions based on set guidelines |
| Audio | Manual volume adjustment | AI auto-levels sound to maintain consistent audio quality |
| Graphics | Custom graphics design | AI generates dynamic, consistent motion graphics |
Troubleshooting Common Problems in AI-Based Video Creation with Hug
Creating videos using AI tools can be a highly efficient way to generate dynamic content, but it is not without its challenges. Users may encounter issues ranging from poor quality output to system errors. Understanding how to address these problems is key to ensuring smooth video creation. Below are some common issues and how to resolve them when using Hug-based AI video generation tools.
Many issues stem from input errors, inadequate system resources, or improper configuration settings. Identifying these problems early and applying the appropriate troubleshooting techniques can significantly improve your video output. Below, we’ll walk through some typical scenarios and provide solutions to help enhance your AI video creation experience.
1. Poor Video Quality
If your generated video lacks clarity or smooth transitions, the following steps may help:
- Check your input resolution: Ensure that the video source materials, such as images or clips, are of high quality.
- Adjust model settings: Sometimes the AI model's settings need tweaking to better fit the desired output. Consider experimenting with higher settings for resolution and rendering speed.
- Verify hardware performance: Low system specifications could impact the quality. Ensure your machine meets the minimum requirements for processing high-quality video.
Tip: Always ensure your source content is of optimal quality before starting the AI generation process. It directly influences the final output.
2. System Crashes or Freezing During Rendering
AI video generation tools are resource-intensive, and occasionally, users may experience system crashes or freezing during rendering. Follow these steps to resolve such issues:
- Check system resources: Monitor CPU and memory usage during rendering. If the system is overloaded, consider closing unnecessary applications or upgrading your hardware.
- Increase virtual memory: On low-memory systems, increasing virtual memory can help prevent crashes.
- Reduce video complexity: Large-scale videos with many transitions or high levels of detail can strain the system. Try simplifying the project to see if it resolves the issue.
Keep your system well-maintained and check for software updates regularly to avoid performance problems during rendering.
3. Common Error Messages
Error messages can often provide hints about what went wrong. The most frequent errors include model misconfiguration or unsupported formats. Here’s how to address them:
| Error | Solution |
|---|---|
| “Model configuration error” | Double-check your input parameters and ensure the model is properly set up for your video project. |
| “Unsupported file format” | Convert your input files to supported formats like MP4, MOV, or AVI before uploading them. |